Overview
SmilartOS is a Linux operating system based on CoreOS (https://www.coreos.com/). There are differences between SmilartOS and CoreOS:
-
OS installation process
-
OS upgrade process
-
Default settings
-
Set of utils
-
SAM
You can use official CoreOS documentation to configure anything in operating system. SmilartOS doesn’t change any binary files in base CoreOS distribution. So SmilartOS is 100% compatible with CoreOS. This documentation describes differences between SmilartOS and CoreOS. You should use official CoreOS documentation for other questions.
Hardware requirements
SmilartOS has only one special requirement: at least 8 GB of RAM.
Other hardware requirements are the same as for CoreOS.
Installator always uses disk /dev/sda as a target disk for operating system. It can’t be changed. If you have several disks and not sure which is /dev/sda, disconnect all other disks except for one that will be used in operating system installation process. You can return other disks after installation completed.
|
Installation proccess
Prepare boot stick
Write iso image to USB stick. Image must be written exactly byte to byte. To do so you can use Win32 Disk Imager in Windows, Image writer in Linux or dd util in any linux/unix distribution.
| You cannot install SmilartOS from DVD disk. |
Installation
First of all, you should boot from USB stick.
-
Insert USB that contains the image in the computer and power it on.
-
Select USB stick as a boot device.
-
Boot the computer from USB stick.
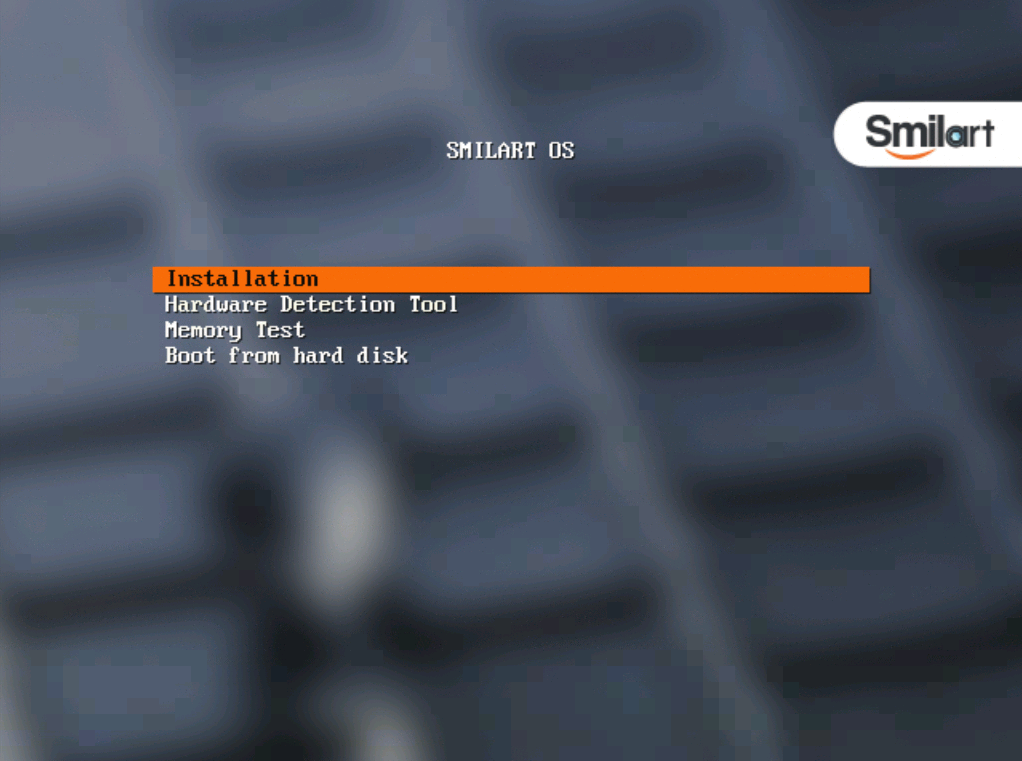
When your computer is booted from USB stick, you will see a boot menu which consist of four items (Image 3):
-
Installation – start the installation process.
-
Hardware Detection Tool – utils to check hardware.
-
Memory Test – test RAM with memtest86+
-
Boot from hard disk – boot the computer from hard disk.
To start installation choose Installation item in the menu.
Installation. First stage.
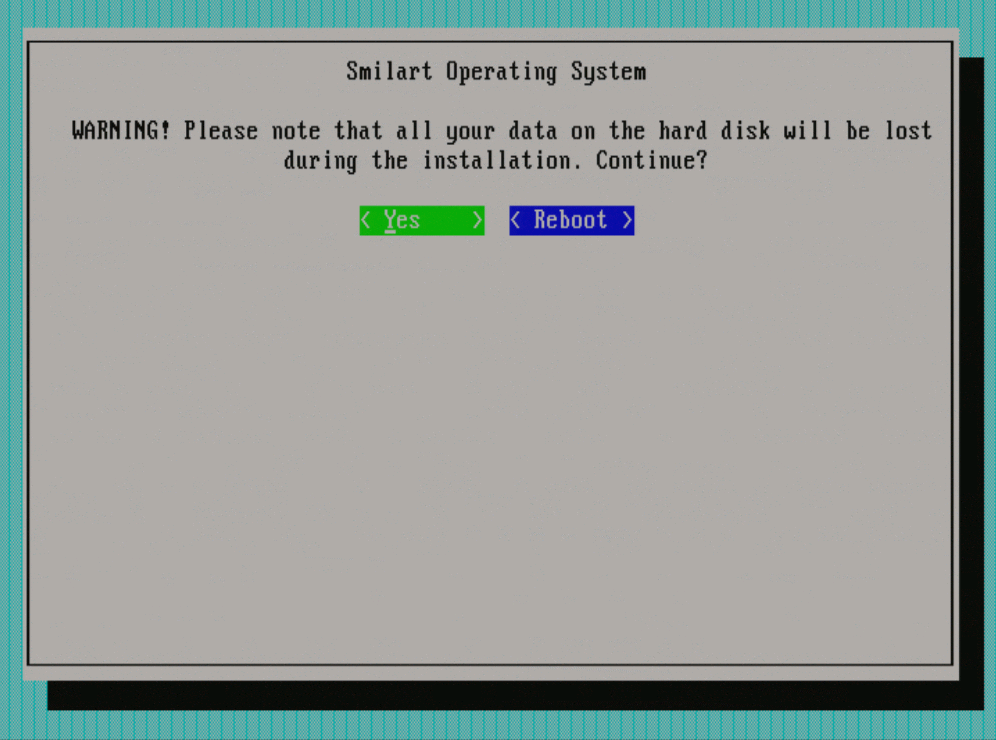
Installer verifies check sums of the installing components and warns you that all data on your local drive will be lost. (Picture 2).
To continue installation process choose Yes or choose Reboot to cancel installation.
Installation of CoreOS image takes a few minutes (Picture 3).
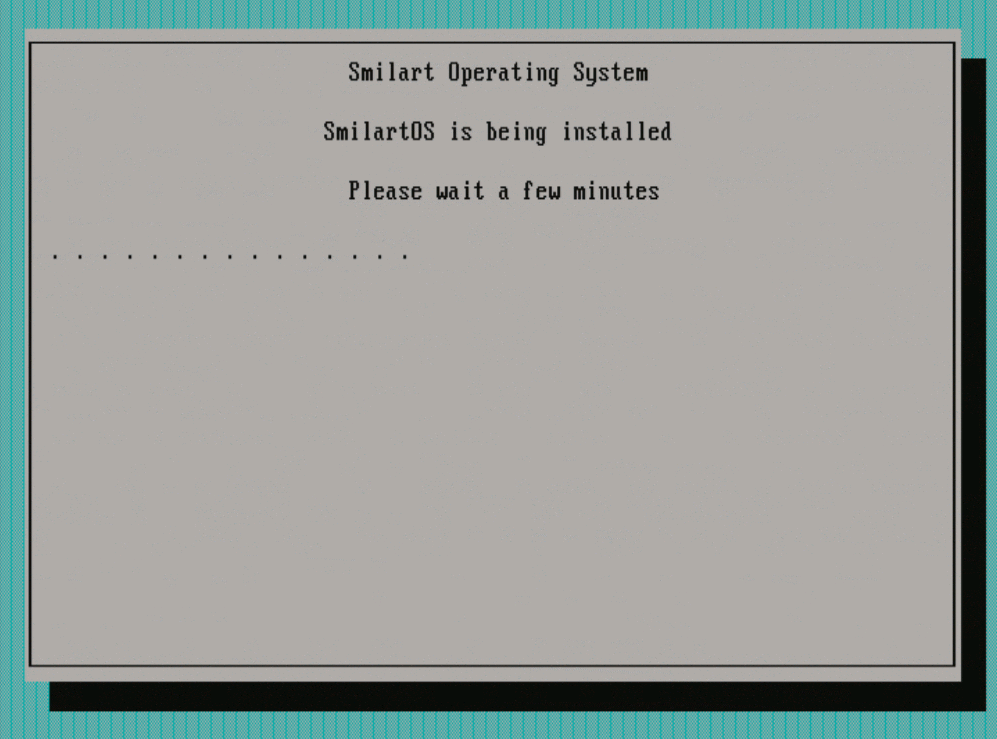
Necessary files will be copied without any questions.
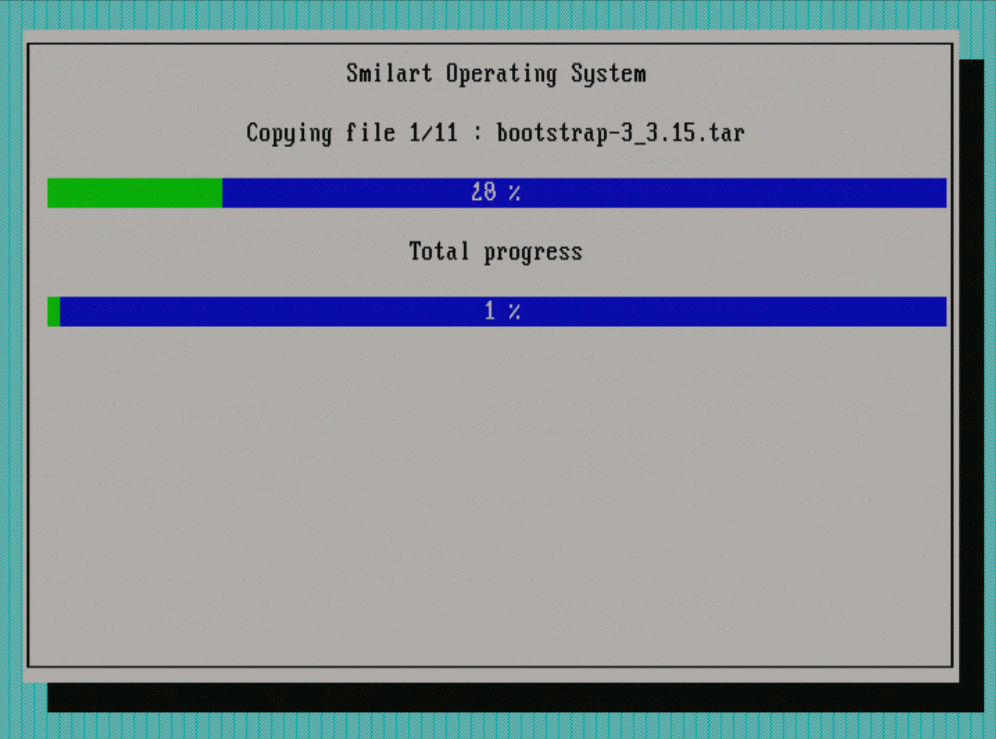
When all necessary files have been copied, press Reboot to reboot the server. Otherwise reboot will be done in automatic mode (Picture 5).

Installation. Second stage.
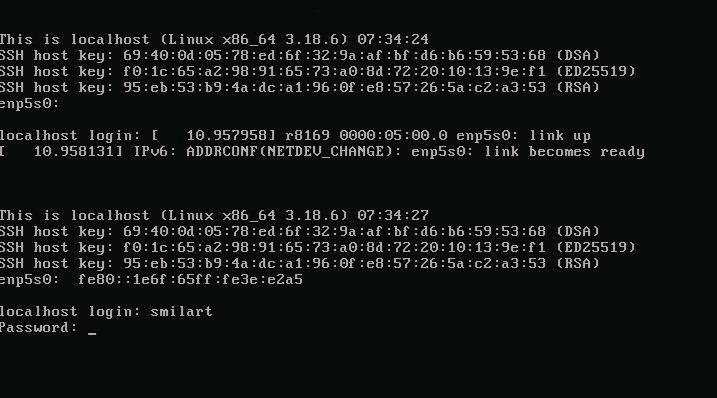
Remove USB stick from the server and boot it from you hard drive.
To log into system use the following credentials:
Username: root
Passowrd: smilart
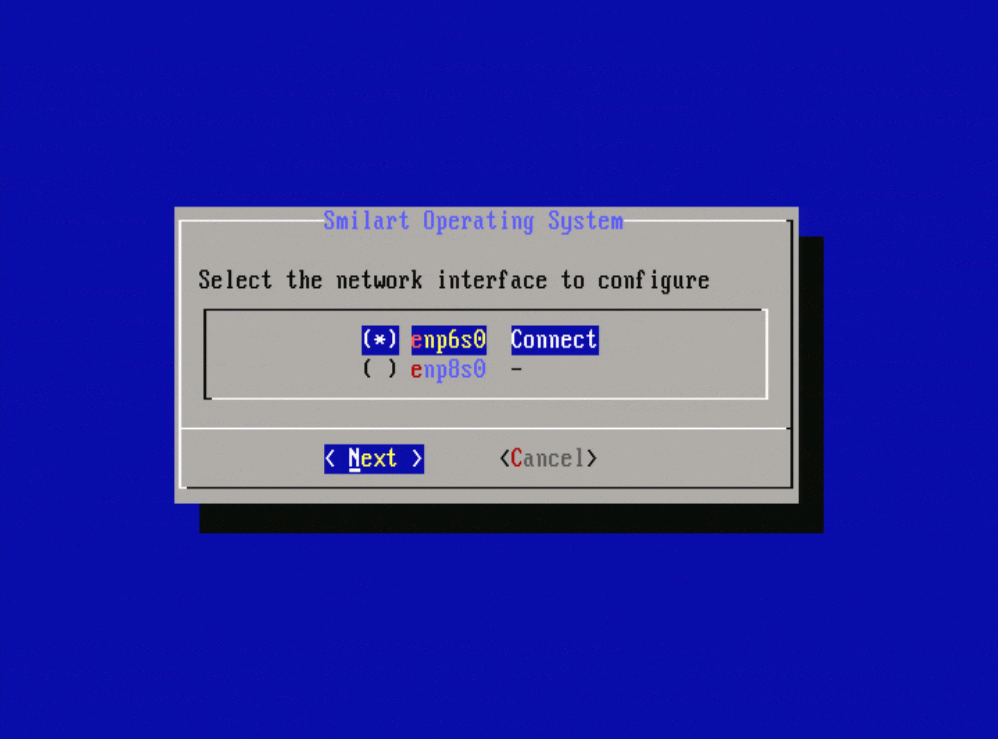
Next step is network cofiguration. Choose network interface card to configure (Picture 7).
Use arrow up/down keys to move between items. Press Space to select. Press Next to configure chosen interface.
Type following data in the opened windows (Picture 8) :
-
Hostname.
-
Static IP-address.
-
Mask subnet.
-
Default gateway.
-
DNS server address.
| Allowed symbols for hostname are latin alphabet, digits and dash. |

You can use network-config if you want to change network settings after installation.
|
| You cannot change hostname through this util after installation |
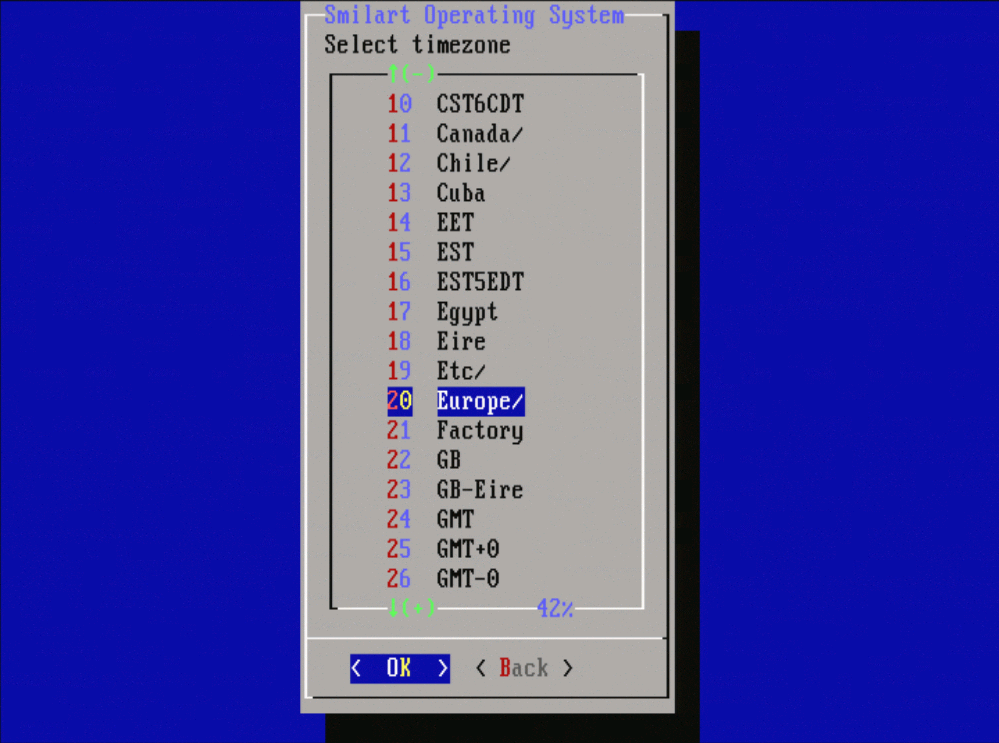
Next step is date-time settings (Pictures 9 - 12).
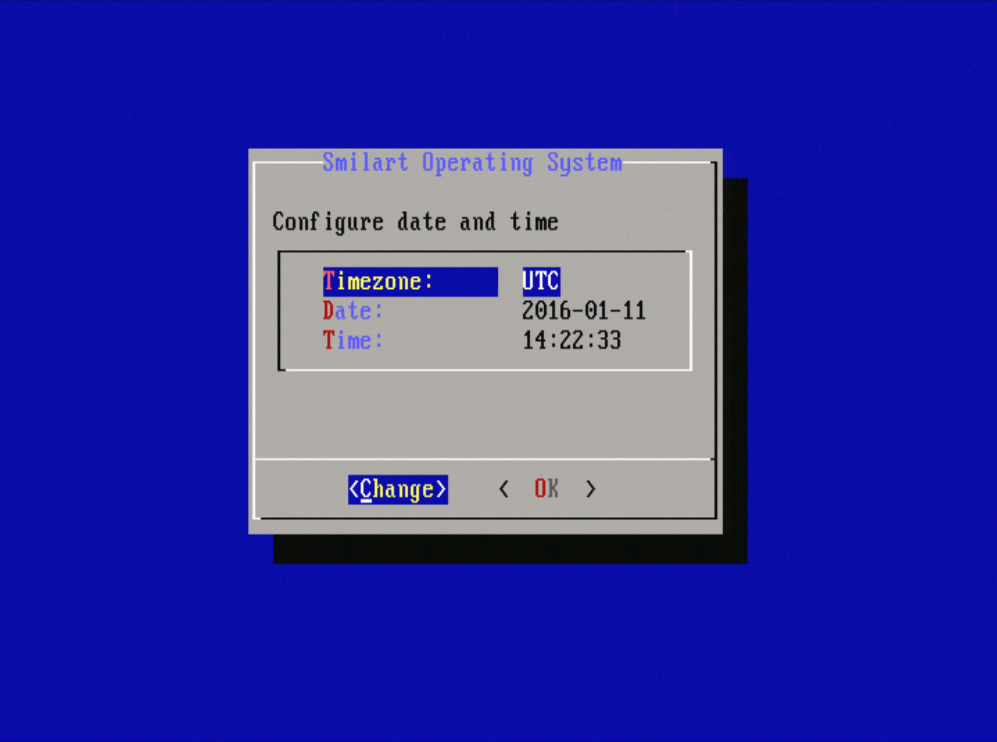
To choose timezone, highlite timezone string and press Change button (Picture 9). .

Last step is installation of applications, which is on your USB stick. It’s non-interactive proccess.
Collecting data for a license.
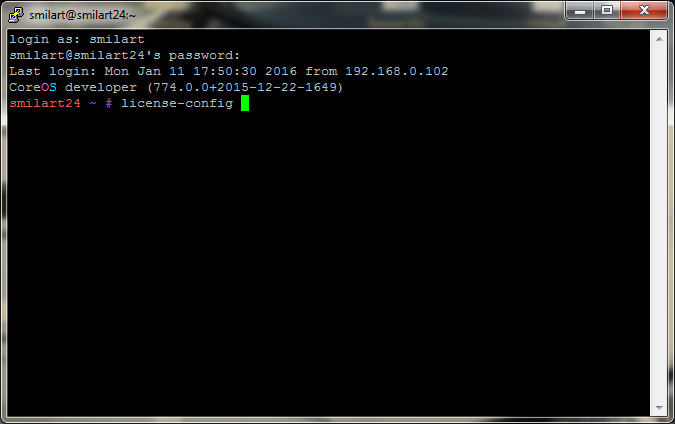
After first run system will require a license. Insert flash-drive and run license-config (Picture 12).
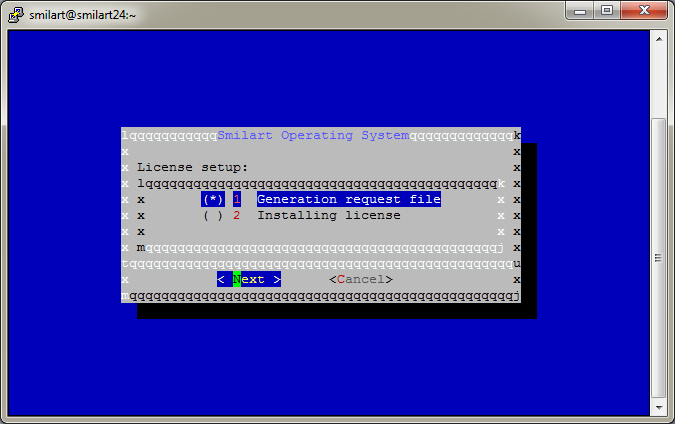
Then choose Generation request file and then press Next button (Picture 13).
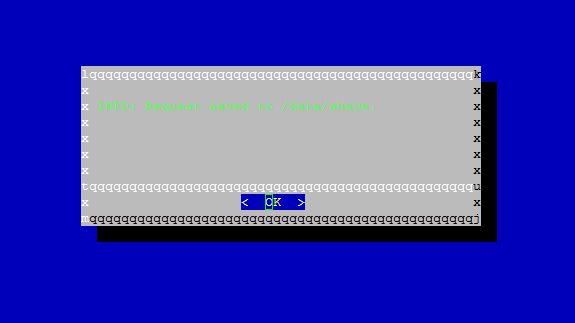
If flash drive is not inserted, you can choose another path for file to save and then copy it to the flash drive.
Then you’ll see a window with information about request file been saved successfully (Picture14). Press ОК.
License acquisition
To get a license key you need to send email with generated request file from the flash drive at support@smilart.com . In reply you’ll have a license key.
| It’s forbidden to rename a license key. |
After receiving the license key you must copy it to the flash drive at the same path where request file is located and then plug it into to the server.
License installation
After inserting flash drive to the server run license-config (Picture 12).
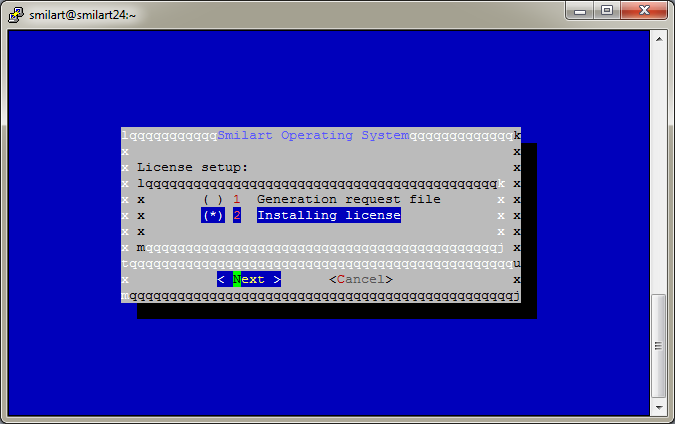
Then choose Installing license and then press Next (Picture 15).
If everything is ok you’ll get a message about succesfull license installation to /var/lib/smilart_srv/license (picture 16). Press ОК.

Product installation
To get instructions on how to install a product, see documentation for the chosen product.